Ultrasonic Bark Control Collar Set Up
Table of Contents
Keep in Mind
Turn the collar off when not in use to avoid false activation and to preserve the battery life.
All dogs within 8 feet of the collar will receive the ultrasonic tone correction.
Move your dogs tag to a separate harness or collar to avoid false activation.
Make sure to take the collar off when a stimulation for barking is not needed.
Materials
Please have the following materials ready prior to set up:

Collar
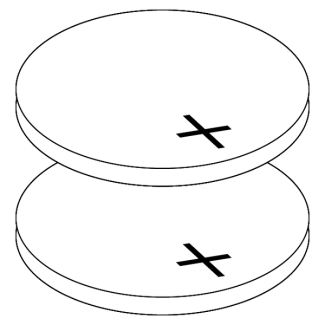
CR2032 batteries x2

Small Phillips screwdriver (not included)
Set Up the Collar
Install Batteries

Use a small Phillips screwdriver to remove the screw on the back of the collar.
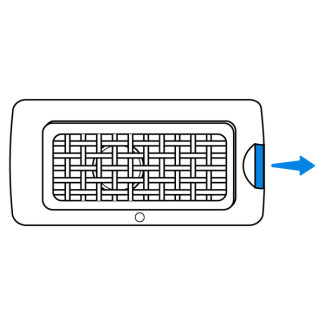
Pull out the tab on the side of the collar to expose the battery compartment.
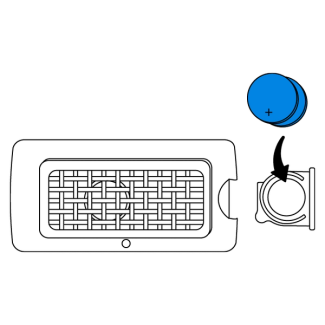
Insert the two CR2032 batteries with the positive side facing up.

Slide the battery compartment back into the collar and replace the screw on the back.
Power

Turn the power switch to the "I" position. The light will flash green to indicate that it has power.
Note: If the collar doesn’t flash green, ensure that the batteries are inserted properly with the positive side up.
Battery life lasts up to two months depending on use. Turn the collar off when not in use to avoid false activation and to preserve the battery life.
Test the Collar
To ensure that the collar is powered on and working properly, follow the instructions below to test the collar.

Blow into the microphone on the collar. The light will turn solid green indicating that the ultrasonic tone is being emitted.
Fit the Collar
Fit Strap

Center the collar on your dog’s neck while your dog is standing.

Check that one finger fits between the collar and your dog’s neck to ensure that the collar is fit properly.
Adjust Strap
For a snug fit, follow the adjustment instructions below.
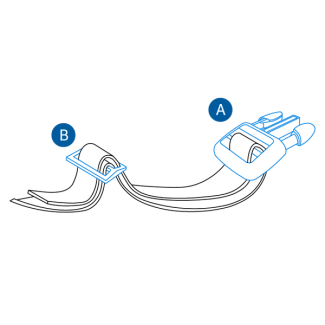
Fasten Buckle
Slide Buckle

To Loosen
Move the strap through the Slide Buckle, fasten the buckles and then pull down.

To Tighten
Move the strap up through the Fasten Buckle, then pull through the Slide Buckle.
Trim Strap
If there is excess strap after finding the proper fit, follow the steps below to trim the strap.
Important: Leave extra room on the strap if your dog is young or grows a thick winter coat.
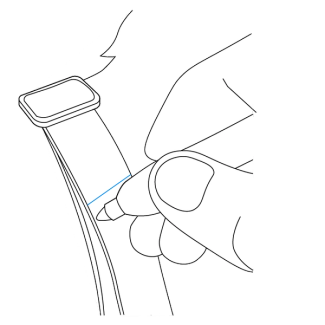
Place the collar on your dog, and mark the strap at least 2 inches past the buckle.
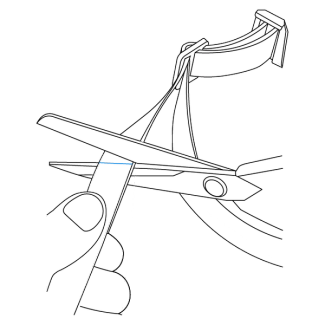
Remove the collar and cut at the mark.
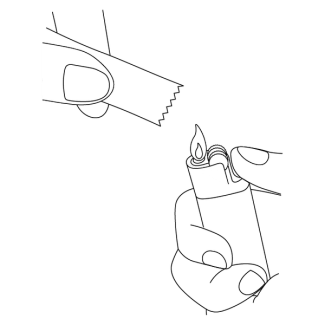
Apply a flame to the cut edge to seal the end of the strap.
Contact Customer Care
If you need further assistance, please contact our customer care team.